Tuesday, December 31, 2013

Origami A Day Timeline: Year-End Review (2013)

Origami A Day
August 16: OAD started (tumblr)
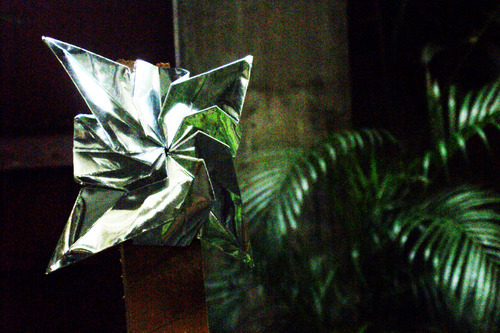
August 16: Sixty-Four (Scott), Jitterbug (Lam), Espiral (Fuse), Eifel Star (Guth)
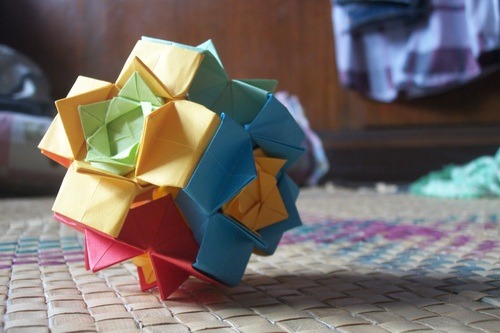
August 17: The TSU-That Simple Unit Series (Esseltine), Sternblute (Sprung), 60-Degree Star (Petty), Modular Ball (Kawahata)
August 18: Robin Star (Sinayskaya)
August 25: Five-In-Four Tess. (Gjerde)
August 29: Square Weave Tess. (Gjerde)
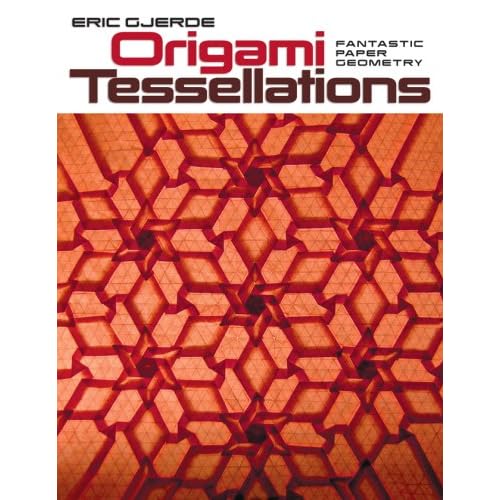
September 4: Bk. Review: Origami Tessellations (Gjerde), Bk. Review: Everything Origami (Gardiner), Star Puff Tess. (Konrad)
September 5: Open Back Hexagon Twist Tess. (Gjerde), Waterbomb Tess. (Gjerde)
September 10: Spread Hexagons Tess. (Gjerde)
September 13: Tiled Hexagons (Gjerde)
September 15: Spiral-Faced Cubocta (Fuse)
September 23: Origami Pilipinas Exhibit
September 25: Hydrangea (Fujimoto)
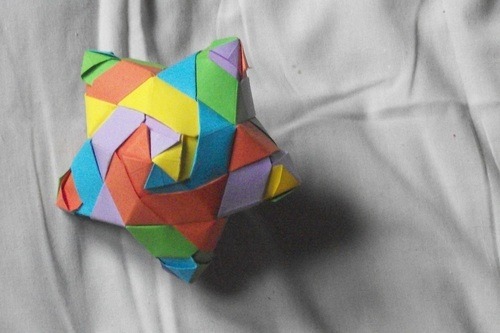
September 29: Apple (Fujimoto), Icosahedron (Uknown, probably Fuse)
October 5: Crossflower (Me), Star Chocola (Me), Polaroid Star (Me)
October 6: Fortunate Star (Me)
October 8: Roman Church Floor Tilling Tess. (Bettens)
October 10: Basket Weave Tess. (Cooper)
October 11: Rhombus Weave Tess. (Gjerde)
October 15, 3636 Tess. (Fujimoto), Pinwheel Tess. (Gjerde)
October 18: Little Bird Bookmark (Dunkan)
October 20: Double Triangle Sawtooth Tess. (Munoz)
October 21: Bird Base Tess. (Bettens)
October 28: Stacked Triangles Tess. (Gjerde), Chateau Chinon (Bettens), Star Twist (Gjerde)
October 31: Field of Stars Tess. (Gjerde), Negative Space Stars Tess. (Gjerde), Aztec Twist Tess. (Gjerde)
November 10: Rosita's Star (Lyndall)
November 15: Types of Origami Models According to Number of Papers Used
November 17: Oriland Magic Star (ORILAND), Cubefields Tess. (Me)
November 19: Pentagonal Shape (Russo)
November 27: Mennorode Star (Sprung)
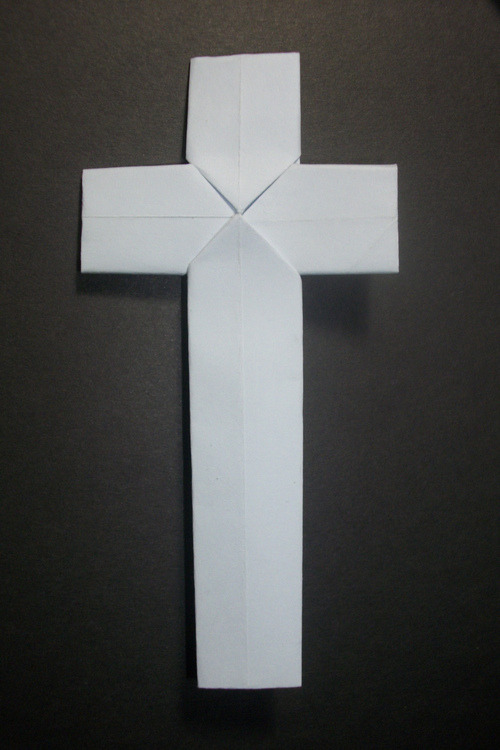
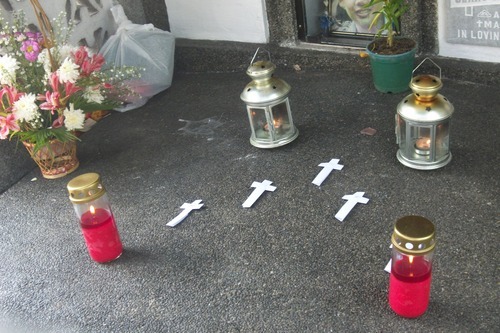
December 1: Latin Cross (Ow)
December 8: Collage of Tessellations
December 12: Daisy Chains Tess. (Gjerde)
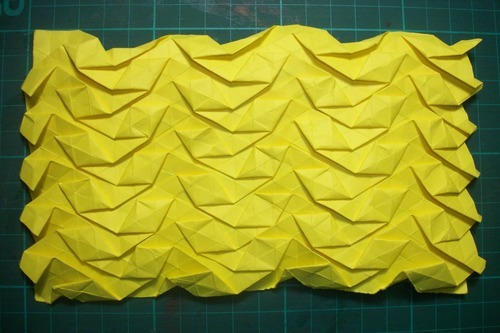
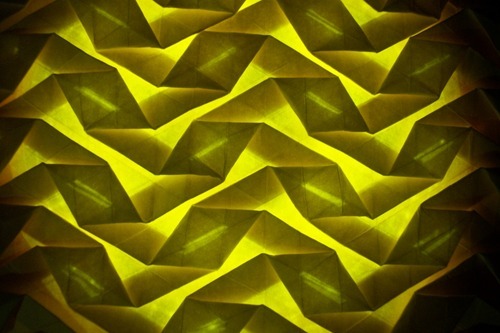
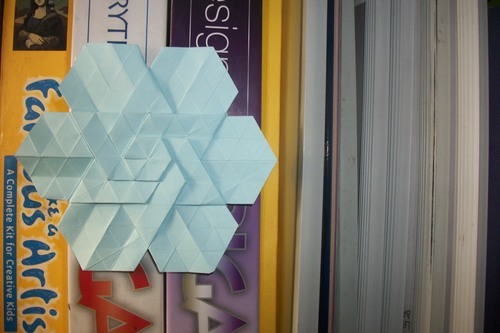
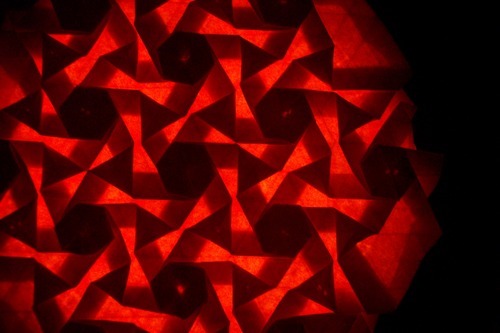
December 15: Rhombic Flowers Tess. (Gjerde)
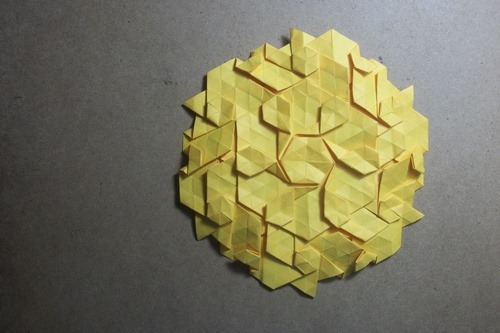
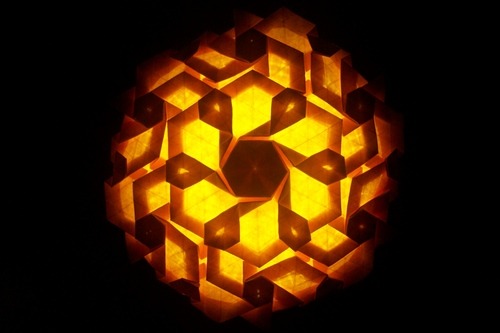
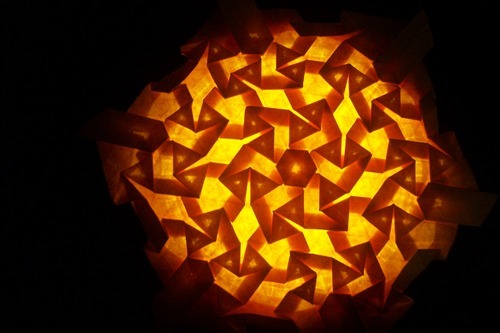
December 19: Arms of Shiva Tess. (Gjerde)
December 23: OAD moves to Blogger
December 25: Christmas Day; Greetings!
December 26: Flowering Grid Tess. (Gjerde), Flowing Rivers Tess. (Me)
December 31: Cercles-Flours Tess. (Diard), Year Review (THIS POST)

HAPPY NEW YEAR TO ALL! :D
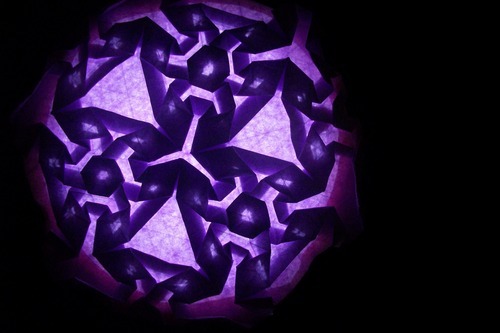
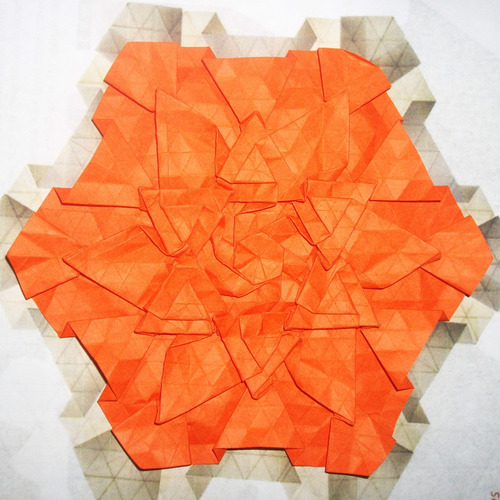


Cercles-Flours Tessellation

I present to you my second-to-last post for the year of 2013: The Cercles-Flours Tessellation designed by Lydia Diard.

Why I decided this to be featured on New Year's Day/Eve? The tessellation has a festive feeling to it. Circles are also considered to be good luck to the Chinese during New Year's Day/Eve.

This tessellation is beautiful on both sides. (Basically all tessellations are). One side depicts a combination of circles and flowers, while the other side features a semi-flagstone pattern.

It's also pretty easy, but I suggest (especially for other tessellations too) that you practice on a small grid first before working on the larger ones. Making grids is hard work and I know you do not want it to go to waste.

This tessellation looks great back-lighted too.


Happy New Year to all! :D :D

Thursday, December 26, 2013

Flowing Rivers Tessellation

This is my design, until someone comes to me, tells me this is their design since they invented it months before I did this, and beat the pulp out of me.

I had some difficulty in this design. Why? A square twist connected to another twist with a flat link will always go the opposite direction. For example, a square twist turning clockwise is properly linked to a square twist turning counter-clockwise.

With that note, notice that the individual square twists all go in the same direction. Meaning, the links are apparently not flat and are swerving. This gives the tessellation its "Ribbon" effect.

Making this model starts with a square twist. Then, make a square surrounding the twist using 4 90-degree pleat intersections, each side one unit from a corner of the square twist. Easy, right? It is! Until we get to the next.

The next step? Make a twist turning in the SAME direction as the first one. This will make a wave-like link between the two. Then make the big square around the twist using the pleat intersections. Be careful not to rip the paper! Hehehe.....

The tessellation looks wonderful though, especially when back-lighted.


I hope you can reverse-engineer this....Otherwise I'll just post the photo directions on this blog. (Oh my god I have to make another).

Flowering Grid Tessellation

This is designed by Eric Gjerde. It is also found in his book "Origami Tessellations" (In the cover and in the gallery at the end) but there are no instructions. I just reverse-engineered this from the pictures.

SOMETIMES tessellations are the easiest to reverse-engineer as long as you know the basics. This tessellation basically needs 120-degree pleat intersections and triangle twists.

So, why did Gjerde use a tessellation which does not have a diagram in the book as the book's signature cover? Meh, I dunno.

The Flowering Grid Tessellation and the Daisy Chains Tessellation are a little similar, considering both tessellations are supposed to depict flowers connected by something.

This tessellation is great for beginners, since it does not use any offset creases, plus the techniques used in this model are technically easy; just use a proper triangle grid. You just have to learn how to reverse-engineer.

It also looks great backlighted:


I encourage you to learn to reverse-engineer from pictures (tessellations without offset creases are the easiest) since you don't have to find the instructions for a model (tessellation). Other subjects can be very hard though. I've only done a tessellation.

Wednesday, December 25, 2013

Merry Christmas!

Well, I came from somewhere and I made this in a hurry just to post something in my blog that would greet the readers of this blog. So, I'm sorry this is the only thing I got to show you. :(

Anyway, Merry Christmas and a Happy New Year to all!

Monday, December 23, 2013

What I have just posted is a review of the models I have posted when I was working with tumblr, divided into 51 posts. Why? I just want all the reviews to be in one site. Well, if you still want to see the old website, just change "blogspot" in the url with "tumblr".

Okay, so that's enough with the review.....ON WITH THE NEW ONES :D

Arms of Shiva Tessellation

This is designed by Eric Gjerde. I think I do not have to repeat where to find the diagrams. :P
So, why is it named after a Hindu God? Shiva (the Destroyer) is usually depicted in art as having multiple arms. Note that the center of the tessellation resembles 6 arms radiating from some source.
It is the last tessellation in the book. I don’t know if Gjerde arranged the models by difficulty, but this tessellation is COMPLICATED. Note that in this tessellation, Gjerde introduces the “teardrop twist” in which apparently, you have to find out by yourself on how to do it. (I still think the Aztec Twist and the Negative Space Stars Tessellations are more complicated).
But, once you are finished, you get rewarded by a very great tessellation that looks very great whether back-lighted or not.

The back has a somewhat leafy pattern. Well, I wasn’t able to photograph the back, but oh well, just search the net. :)
Gjerde has steps in the book for making the model, which stated making the teardrop twists first. But, I did NOT follow them. I just did the big hexagonal twist in the middle first. For me, doing the hexagon thingy is A LOT easier.
This has been one of the best tessellations I have made yet. :D

Rhombic Flowers Tessellation

This is designed by Eric Gjerde, though when he made the crease pattern, he wasn’t able to make the tessellation itself yet.The first time I saw the tessellation finished was the Elephant-Hide model by Sara Adams (happyfolding).
This tessellation is a little hard to create. It is one of the complicated (but intermediate) tessellations by Gjerde, yet the crease pattern cannot be found in the book.
Instead, it is found in Gjerde’s website: http://www.origamitessellations.com/2009/08/rhombic-flowers/

The 
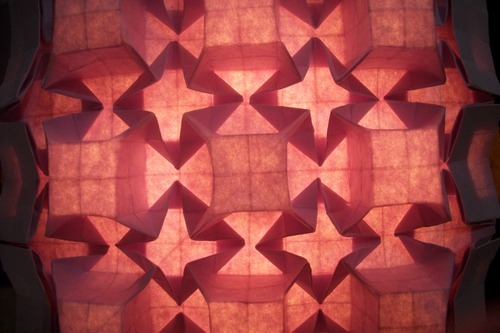
tessellation is composed of flowers created by rhombi (duh) and stars created by hexagons (formed by 3 60-degree pleat intersections) and some triangle-like paper formed by 2 rhombi.
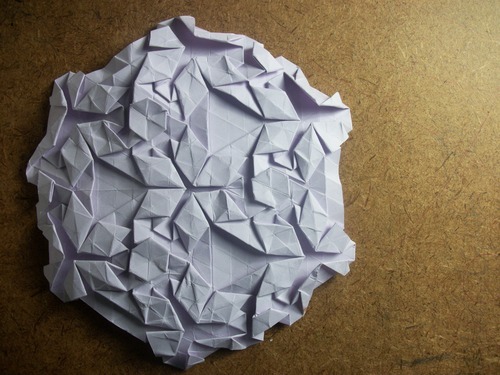
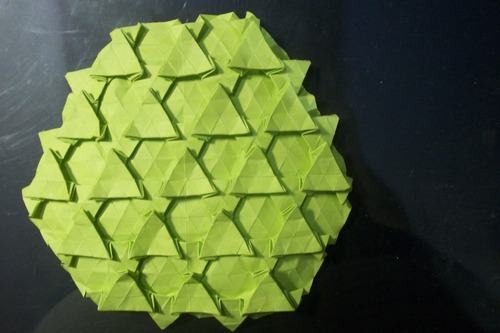
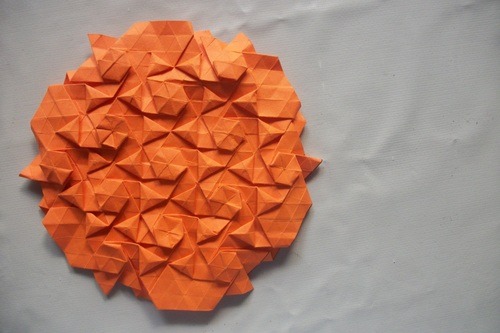
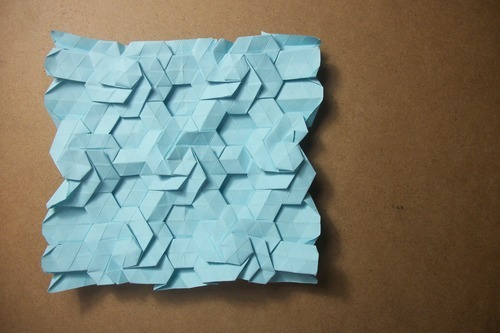
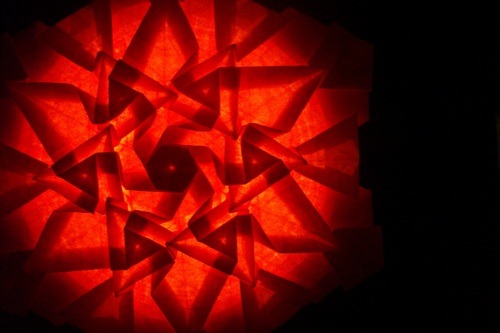
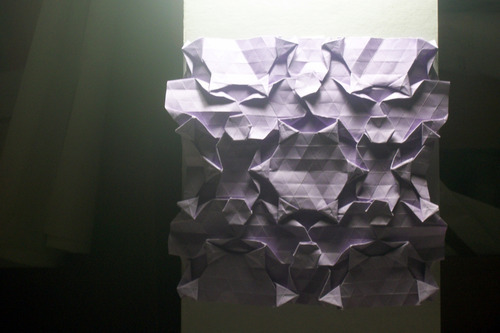
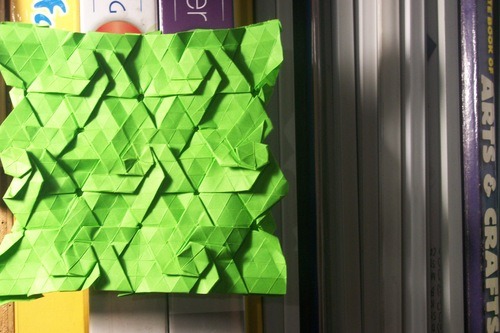
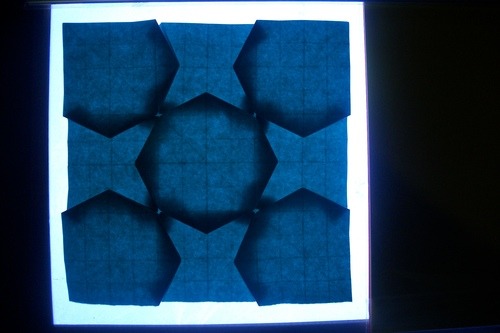
The pictures above are models created from a 32 x 32 grid, but the diagrams have a 64 by 64 grid.The model looks complicated but for me, I would say that the difficulty is intermediate.
I have also done the tessellation in tracing paper, but it was a lot harder than folding construction paper…….tracing paper can be crappin’ stubborn.

Daisy Chains Tessellation

This is designed by Eric Gjerde. The diagrams/crease pattern can be found in his book “Origami Tessellations.”
When I saw first this tessellation, I was like, “oh wow! So beautiful!" but when I saw the crease pattern in the book (which uses a 64 by 64 grid) I was like, "oh crap.”
But then, I thought, “what would it look like when I use a 32 by 32 grid?” and so, I got the tessellation in the picture below.
In the book, it is labelled as “intermediate”. The way it is tilled is very similar to the “Star Twist” Tessellation I featured months ago, but this model is more complicated. Tilling the flower can be a bit complicated, but the end result is worth it.
image
In the book, it is one of the few tessellations which does not have a “back-lighted” photo in the book. I do not know why, but I’m not supposed to care about it much either. Anyway, it looks beautiful when back-lighted.
image

Latin Cross

This is designed by Mr. Francis Ow, famous for his geometric designs and heart-based models.
I was supposed to feature this on November 1 (All Saint’s Day) or November 2 (All Souls’ Day) but because of my hectic schedule I wasn’t able to post it……..
Going on with the model, It is considered Multipiece Origami (made of 2 or more modules but does not have to have the same appearance). It is made of 2 rectangles, one being longer than the other.
This is a good addition to an altar, and a tombstone of a loved one, if your religion is Christian or anything related to it. It is also a good Halloween decoration (though speaking about Halloween is awkward, considering it is already at least a month ago and usually people are already talking about Christmas once December sets in).
image
image
(placing 5 crosses on the tomb of my grandfather, friend, brother, and great grandfather, and the rest of my relatives)
Diagrams on Ow’s website (hosted by Nick Robinson)
http://www.nickrobinson.info/clients/owrigami/show_diagram.php?diagram=cross_latin

Mennorode Star

This origami model is designed by Carmen Sprung.
It uses 12 rectangles of specific ratio and proportion. But, preparing the rectangles need cutting off an edge. Such action makes many people think that the Mennorode Star is not origami anymore.
Well, IT STILL IS. Remember that you are just shaping the paper. It’s like preparing a square from a rectangle. Only internal cuts are not allowed.
When you make the 12 units, you cannot assemble them into a star just yet. The units must be paired (resulting in 6 pairs.) One pair will be assembled into a bimodule. The 6 bimodules will be assembled to form the star. Wew, think about complex assembly.
Making the units and assembling the modules and bimodules are easy, until you have to connect the 2 ends to form the star. This point can be confusing, especially when the paper is too tight. But, once you get the hang of it, making the star can be very addictive. Lel…..I have already made 12 stars.
This star works great as a Christmas Decoration, especially if you use green and red paper. To achieve the star’s best effect, use 6 rectangles for each color (if you use 2 colors.)
image
image
(wew….brings so much memories of my stay at our beach house….the sun…the sand…the radioactive jellyfish…)
Sprung has posted the diagrams for this star. http://www.origamiseiten.de/diagrams/Stern_Mennorode_neu.pdf
But if it can be confusing, there are instructional videos in youtube.

Pentagonal Shape

This is designed by Andrea Russo. You can visit her page at http://www.flickr.com/photos/9874847@N03/with/5938545126/
There are no available diagrams of this model yet. I just reverse-engineered this thing from the photo. I was surprised I was able to make it since I’m super terrible at reverse-engineering models from the photos.
I think it can be considered as a recursive tessellation, like the hydrangea, since the same shape keeps appearing smaller and smaller in the middle.
There is one little problem with this model……Remember that you can make a pentagon out of a hexagon simply by folding 2 points together? Yes, but it will not be a flat model….it will form a cone. But, once you let go, the model will become flat again. That is the problem with Russo’s design.
But, if the right (strong and thick) paper is used, your hard works will be rewarded by this:
image
OFF TOPIC STATEMENT: For all those who have prayed and helped for the recovery of the victims of Typhoon Haiyan (local: Yolanda) which have devastated my beloved country, THANK YOU VERY MUCH! Your kindness will forever be written in the hearts of the victims of this devastating Typhoon. <3

Cubefields Tessellation

Another addition for my designs, this is just a modified five-in-four tessellation, first designed by Eric Gjerde.
It really looks like a chocolate bar when I fold it with brown paper. It looks very great when it is back lighted. So, since this model and the Five-in-Four start similarly, the products are very different.
If you know how to fold the Five-In-Four Tessellation, you will be able to create this without a problem.
image
image

Oriland Magic Star

This beautiful but head-aching action model is designed by Yuri and Katrin Shumakov, the creators of ORILAND.
There are many ways to fold this star, either by only one piece of paper, or using multiple sheets of paper. I chose the modular version, since folding the one-piece version will leave my hands shaking violently like the hands of a person with Parkinson’s Disease while standing on the roof of a squatter’s house during a 7.5 magnitude earthquake.
Anyway, The star is very beautiful. It is an action model, like Yamauchi’s fireworks. But, the Fireworks is  A LOT easier than folding the Oriland Magic Star. Just folding the units of the Oriland Magic Star will leave your head aching. The results are nice, though.
image
This is certainly NOT a good model for beginners, but if you want a model like this, Yamauchi’s Fireworks is a good start.
The ebook can be bought from their website
http://oriland.com/

The Types of Origami Models According to the Number of Pieces of Paper Used

1. Single-Paper
In the old times, this is usually considered as the “true” origami models, years before the “one-paper” policy has been abolished. I wonder what bastard would implement such “one paper” policy crap or something.
Example: Crane (Traditional)
image
2. Multipiece Origami
This origami is made of two or more pieces of paper, folded into simple forms called “units.” The challenge usually is in the assembly, but if the model is made of a freaking large number of units (like a hundred), the challenge can also be in that too. It’s a cheaper and painless alternative to cremating your hands…:P
In the old times, multipiece origami is not considered origami. But now, the crappy “one-piece” (pweh!) is abolished (yey!).
Example: Mercury Kusudama (Makoto Yamaguchi)
image
2.a. Modular Origami
Modular Origami is a subset of Multipiece Origami, since……duh! We use lots of paper on this one too. But what makes it different? The units of Modular Origami have to be completely IDENTICAL. The Mercury Kusudama above uses 2 types of units: a cross-shaped module and a flowery thingy which is meant to be inserted in the middle. The TSU, shown below, has all its modules shaped like little dissected worms. o.O
Example: That Simple Unit (Charles Esseltine)
image

Rosita's Star

This is designed by Rosemary Lyndall, so I have no idea on who the heck is Rosita.
PS. If I accidentally misspell some word, well blame it to this piece of sh!t I call a “keyboard.”
Well, going on with this model, this is a very unique star. It’s like a 4-pointed star with some swirly ice cream thingy in the middle. It’s also easy to make. I recommend this for those beginner origami artists who want to make an unusual model.
image
The diagrams are in Lyndall’s website: http://berrylyn.blogspot.com/2010/01/rositas-star.html

Aztec Twist Tessellation

This is a complicated model designed by Eric Gjerde, and hthe diagrams are found in his book “Origami Tessellations.
This tessellation is pretty complicated, since…
1. There are A LOT of offset creases to be folded.2. There is a part where you have to fold a twist, and then fold a triangle below that twist.
3. There are some twists “in the wrong direction” that you have to correct in the end, specifically the hexagon twist in the middle and the arms of each triangle twist.
But, if you were able to do it, you will be rewarded with a superb and beautiful model reminiscent of the designs commonly made by the Aztec Tribes.
image
image
For the difficulty rating, I will give it a 7.5.
This is not a tessellation for the beginners or the lazy people. If you are one of them (oh my god I'm talking about beginners please don't be offended) , just start with the Five-and-Four Tessellation.

Negative Space Stars Tessellation

This is designed by Eric Gjerde, and the instructions can be found in his book “Origami Tessellations”.
This tessellation is unusual compared to the others, since it does not have any twists or pleat intersections (other than the 60-degree pleat intersections forming the hexagons, but you can still eliminate them to create an appropriate tessellation).
It’s called “Negative Space Stars” since you have to hold it against the light to see the stars that cannot be seen when it is not back-lit.
What can be irritating about making this model is that you have to make a LOT of offset creases. But, in order to make a “not-junk” masterpiece, you have to fold the offset creases properly. This is the type of tessellation not appropriate for lazy bastards out there.
This has also become one of my favorite tessellations.
image
image
In the book, this is labelled as “advanced”. Well, because of the creases and the techniques, I have to agree this is a bit difficult.
I love how the tessellation forms a ring around the center star, and there are 6 rings intersecting the middle ring.
This is my 22rd tessellation, and my 2rd “advanced” tessellation, :D

Field of Stars Tessellation

This is a tessellation designed by Eric Gjerde, and the diagrams can be found in his book “Origami Tessellations.”
Apparently, it is categorized as “advanced" in the book, though it is actually easy to make.
The tessellation has a star twist in the middle, surrounded by other complex designs.
When put to the light, it looks like a spider web clinging to a star, or maybe not.
Because of it’s great and web-like design, this became one of my favorite tessellations.
image
image
For the difficulty rating„,well you know my style……..I’ll give it a 5.
It has been used in the original cover of “Origami Tessellations.”
image
(courtesy of Desma 22)
Well it wasn’t used since Gjerde described the cover as “old-style.”
So that’s all I got to say…..

Star Twist

This is designed by Eric Gjerde, and the diagrams are found in his book “Origami Tessellations.”
Although it is in the book, I do not think this can be called a tessellation since an origami tessellation can be a repeating pattern (like the normal ones we see everyday) or the ones that we call “recursive (the same model design appears in a smaller scale in the middle and so on, like the Hydrangea). Such characteristics cannot be seen in this model.
image
Then why is the snowflake/flower-like thing in the Origami Tessellations book? Well, it is because this model can be tilled to form an appropriate tessellation. (Note: the hydrangea can also be tilled, but a single unit can already be considered as a tessellation itself).
image
image
So, if you have only folded the snowflake-like one (the light blue one), then you did not fold the tessellation itself. It’s why it is labelled as intermediate in the book; tilling the model can be hard work unless you know the right technique.
The model is composed of hexagon twists, 60-degree pleat intersections, and 120-degree pleat intersections arranged to form a star with a spiral-like thing in the middle.
Note: Eric Gjerde was able to tell a hint on how to tile the model in the book.

Chateau Chinon

It is a tessellation designed by Christiane Bettens, while the diagrams are in the book “Origami Tessellations" authored by Eric Gjerde.
In the book, it says that the tessellation is named after an architectural tilling (which inspired the tessellation) born in Chateau-Chinon, France.
It is the first tessellation in the book labelled as “intermediate”. Why intermediate? Well, besides the almost-confusing way to fold the various shapes in the model, you have to do an awful lot of creasings. If you make a simple mistake in making the creasings, your whole artwork will be like the rags used to wipe the asses of horses pulling the carts in old Spanish places.
But, if you do everything right, you will be rewarded with a nice tessellation consisted of irregular octagons and squares.
image
image
Once again in the rating of “if it is easy or hard” well I’ll give it a 7.
The posterior is also beautiful (though I do not have a picture). It’s one of those tessellations where you cannot decide which side are you going to display. But, meh, if the book says this is the front, then so be it.

Stacked Triangles Tessellation

This is designed by Eric Gjerde, and the diagrams can be found in his book “Origami Tessellations.”It is basically composed of rabbit-ear triangle sink folds arranged in a way to make it look like stacked triangles.
It is a bit hard, but things will go smoothly when the precreasings are done right.
image
image
The back also looks great. Just imagine of interlocking hexagons since I do not have a picture of the posterior side.
If I were to give a rating from 1-10, 10 being the hardest, I would rate it a 6.5.

Bird Base Tessellation

This is designed by Christiane Bettens, the same person who designed the Roman Church Floor Tilling Tessellation I have featured before.
The diagrams, one again, are found in Eric Gjerde’s Book “Origami Tessellations.”
In the book, it is labelled “Intermediate.” Well, it’s pretty easy, maybe if you did what I did (i used a grid of 16 X 16 units).
Apparently, you can expand the range of the tessellation. I just was not able to since I was very sleepy when I made this.
imageThe 
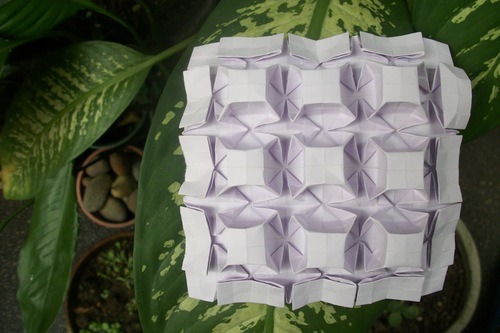
tessellation is simple, but elegant. It is also pretty easy to fold. You just have to make a lot of creasings to achieve the best output.
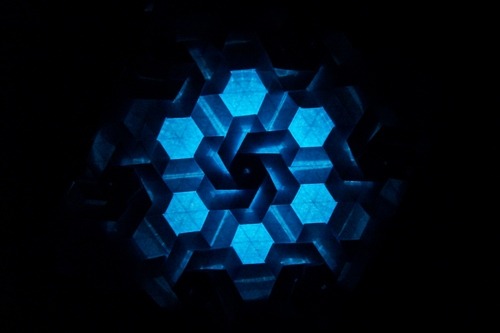
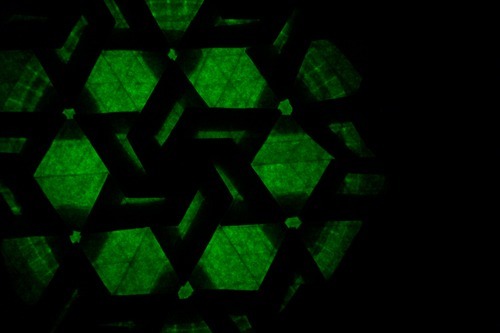
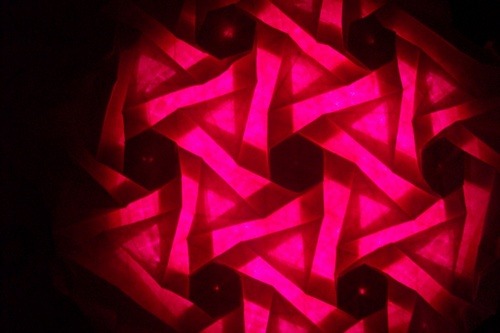
Double Triangle Sawtooth Tessellation

This is designed by Miguel Angel Blanco Munoz from Barcelona, Spain, while the diagrams are in Eric Gjerde’s Book Origami Tessellations.
When I started in making it, I was like, “wow, it’s so easy. I wonder why Gjerde put it in the intermediate section of the book." Well, I found out why.
Start working from the center, and it is pretty easy. But when you reach the rim of the tessellation, you will have no choice but to open the paper up.
If that is not how you did it, well that’s how I was able to complete it. But, despite it being very hard, at least the tessellation turned out pretty nice.
image
image
The tessellation is composed of some not-so-ordinary hexagon twists, and some triangle twists connected together in a way that they form a rhombus.
If I were to rank it from 1-10, 10 being the hardest, it would be a 6.
From the picture, it really seems easy. But, when you start making it, it may be a little pain in the ass, but it’s worth it.

Little Bird Bookmark

This is designed by Barth Dunkan.
I was looking at some funny images and bastard-looking people (who are not my friends on Facebook…I mean my friends on Facebook are happy and friendly XD sometimes they make my day brighten up a bit) on Facebook.
Then one of my friends message me and tells me to make this cute bookmark.
The model really caught his attention, and knowing that it is origami, he came to me.
Then I said, “Sure, I guess.
And now, I present to you, this quaint little bookmark which also acts like a stand-alone over-the-edge decoration or maybe an eyesight-destroyer if you use all-red paper and a bastard camera.
image
If you think the photo is out-of-focus, well it’s just because some parts of the bird is made up of many layers of paper. I never use a poor quality photograph in Origami A Day.
The model is a bit complicated. If I were to rank the model’s difficulty from 1-10, 10 being the hardest, I would give it a 4.
Like a tessellation, you need to fold an 8 by 8 grid on the square paper. There are also so many pre-creasings, but your hard work will be rewarded by a nice bird bookmark in which you have to slam the poor bird’s tail between the 2 pages you are stuck in, in the book.
http://neorigami.com/neo/index.php/en/component/k2/item/7002-little-bird-bookmark

Pinwheel tessellation

This is designed by Eric Gjerde, and the diagrams are in his book “Origami Tessellations”.
When you make this tessellation, expect A LOT of creasings, since you will be needing it in the open-back triangle twists.
Gjerde stated in his book about this tessellation that this is one of his favorite tessellations, and he hopes that it also becomes one of MY favorites.
It’s nice I guess, oh what the heck. I LOVE IT.
image
image
It’s just a couple of hexagon twists and open-back triangle twists put together to make a masterpiece (wow ah) and it’s really easy.
PS. The diagrams in the book used a hexagon-shaped piece of paper. The photo of the tessellation used a square piece. Oh well, maybe it’s a matter of common sense and stupidity. :)
If you want a square tessellation, use a square piece. If a hexagonal tessellation, use a hexagonal piece. Sounds simple right?
The same mistake goes with the 3 6 3 6 tessellation diagrams.
Oh well, all I can say about it is, it’s a good tessellation for beginners. :)
I guess it is already one of my favorites :D though my SUPER favorite is the Open-Back hexagon Twist. :) Yep, the one Sara Adams is upset about when she used transparent paper.

3 6 3 6 Tessellation

This is designed by Shuzo Fujimoto, and the instructions are in Gjerde’s BookOrigami Tessellations”.
I wasn’t aiming for this tessellation at first. I was supposed to make the famous Arms of Shiva tessellation, but I immediately lost interest with it (I did not say I cannot do it). Then, I thought about the paper.
I thought, “sayang, maaaksaya tong papel na ito,” which meant, “Pity, the paper will be wasted,” and so I made this:
image
…….which when not back-lighted, looks like this:
image
PS: Orange is my favorite color :D
It’s really easy, and it yields a beautiful design when back-lighted. It is just a couple of hexagon twists and triangle twists, that’s why it is named “3 6 3 6" after the number of sides of a triangle and a hexagon.
Somehow, Its size shrinkage also is great, much greater than the Basket Weave Tessellation last time. So, apparently, this is the smallest tessellation I have made ever since I have posted this post. (wut)
Maybe I’ll do the Arms of Shiva next time…..

Rhombus Weave Tessellation

This is designed by Eric Gjerde and instructions are found in the book “Origami Tessellations”.
The tessellation I made is VERY different from the tessellation pictured in the book.
This is from the book:image
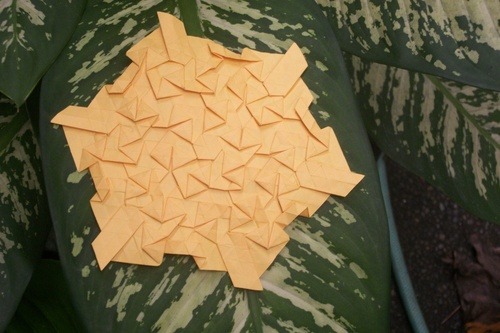
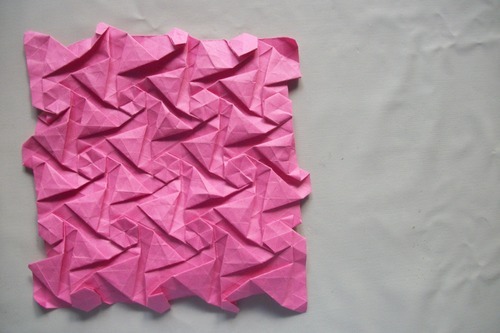
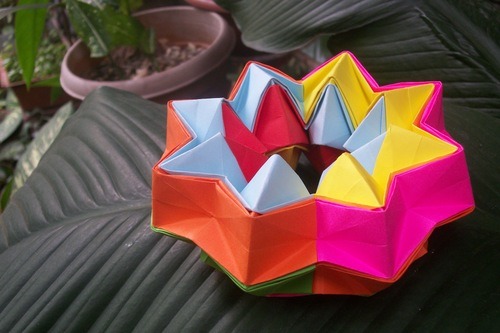
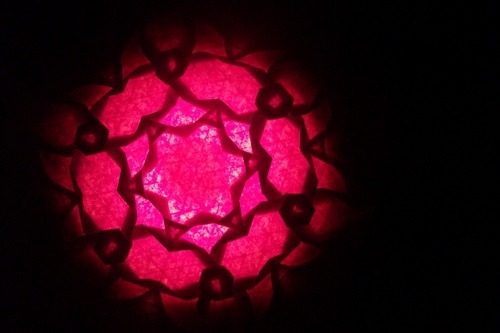
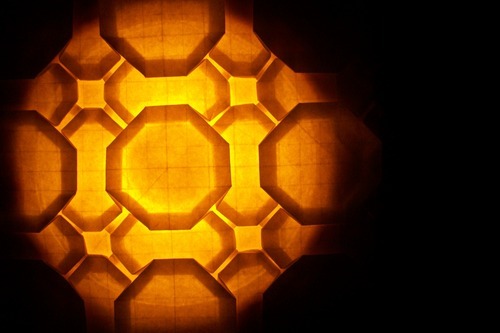
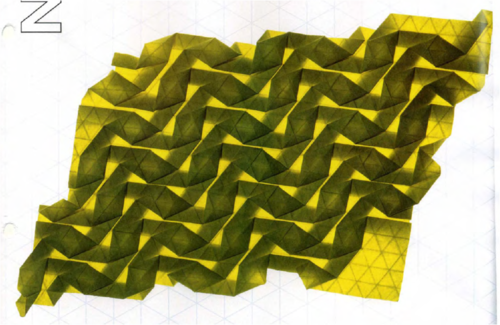
This is what I made:
image
Looks boring, right? I searched the tessellation in Google and guess what? Only ONE person was able to make the tessellation version shown in the book.
According to Gjerde, if I use a square in this tessellation, a parallelogram shaped tessellation will show up. Guess what? I got a rectangle.
It still looks nice though, especially when it is back-lighted.
image
So somehow, I felt a half of success, and a half of disappointment, but I still feel pleased with my work.
Maybe I will try to figure next time how Gjerde got a parallelogram-shape. But I’m still keeping the rectangle :)
The tessellation is labeled as “Intermediate” in the book, though it is pretty easy. Maybe it is because you have to figure out in what part of the grid you will make the twist since one simple mistake will make your tessellation looking like a bastard piece of paper.
Basically it is just a series of rhombic twists arranged to look like a wave or some snakeskin or whatever.
This is my tenth tessellation.
Related Posts Plugin for WordPress, Blogger...